Introduction
One of the items on my long term to-do list was to put my old hard drive collection to use by creating a network attached storage (NAS) machine. Over several upgrades over the past few years, I had amassed several 500gb-1tb drives both in 2.5' and 3.5' varieties that were collecting dust. The question quickly became- what was the cheapest and most cost effective way to build a NAS?. Specifically, many of the off the shelf solutions such as Synology carried out the duties of a NAS quite well; however, came with many downsides including the lack of multiple drive bays and quickly rising expense depending on how many drives it supported. Additionally, the many JBOD (just a bunch of disks) platforms that exist, despite being fairly cheap and supporting multiple drives, simply lack the network utility that a modern NAS can provide.
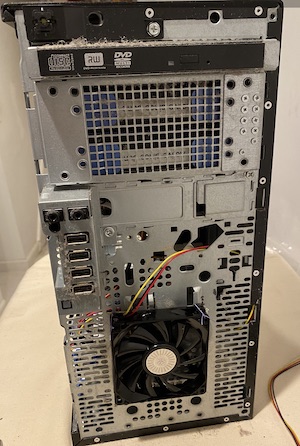
Parts
I quickly realized during my research that there simply weren't any off the shelf solutions on the market that would fit my requirements of: inexpensive, ability to utilize multiple small drives, and reasonable performance. At this point I had decided to build my own based on the Open Media Vault (OMV) platform. Based on Debian, OMV offers a plethora of features that any any modern off the shelf NAS will provide, although, with a slightly less intuitive user interface. The following is a breakdown of the parts I used and total cost.
Case: iStarUSA D213-mATX 2U Rackmount case ($0, purchased several years ago at NewEgg ~$45 USD)
PSU: 500W OCz ($0)
CPU: Intel G5400 ($54 @ Microcenter)
Motherboard: Gigabyte B365 DS3H ($70 @ Microcenter)
Memory: Crucial 8GB DDR4 ($25 @ Amazon)
Harddrives: Inland 128gb SATA SSD ($25 @ Microcenter) and $0 for 5tb of storage (5 drives ranging from 500gb-2tb)
Case fans: 80mm intake fans (~$6 @ Amazon)
Software: $0
Total: $186
As you can see, I managed to re-use many of the components I had laying around; however, even if I had bought all the components at the time of building my total cost would have still been in the $250-270 range which is still way beneath the price of the remotely comparable Synology DS220+ which is going for $299 on Amazon at the time of writing this article.
| Part | DS220+ | Custom | ||
|---|---|---|---|---|
| CPU | J4025 @ 2.0Ghz 2 threads | Pentium Gold G5400 @ 3.7Ghz 4 threads | ||
| Memory | 2gb DDR4 | 8gb DDR4 | ||
| Storage | 2 drive bays | 6 SATA connectors → 6 potential drive bays | ||
| Network | 2x1gb LAN | 1x1gb LAN |
Pros/Cons
Being the closest comparison off the shelf competitor, I used the DS220+ as my comparison point. From a performance, memory and storage aspect, my custom build was both cheaper and faster. Not to mention it also gives me the ability to replace and upgrades parts in the future as I see fit.
Now what are some downsides? I would be a liar if I said setting up OMV was anywhere near as simple and polished a process as Synology is. Unfortunately, despite all the developers best efforts, OMV is still a community developed project that still shows its roughness around the edges. Below are some of the issues I ran into while setting up the software.
- Upon installation finishing, I couldn't access the web gui despite the installer claiming I should be able to. This required me to connect via head and run
omv-firstaidcommand from the terminal in order to reset the web gui as well as declare a static IP address. - The process of setting up hard drives, creating a pool between the drives and creating shared folders is far from obvious. This process once again is made far simpler in Synology and just works. I plan to write a summary article on this soon to simply things for myself in the future.
- Upgrading drives can also result in unexpected issues. The week after installing OMV, I had upgraded one of my 500gb drives to a 4tb drive due to SMART errors suggesting the former would fail soon. I unmounted the drive and shut down the machine thinking a simple swap would be painless. Unfortunately I was wrong. OMV had issues booting and being a headless machine, as soon as I couldn't access the web gui I knew something was wrong. After an hour trouble shooting after connecting via head to the machine and being unsuccessful in fixing the issue; I ended up just re-installing the entire OS which fixed the issue. I doubt these kinds of issues plague Synology.
Summary
If you're in the market for a NAS and are even moderately technically capable (or willing to learn/experiment) I highly recommend going the custom route. If you want to build your own machine but want a bit more of a polished experience, I would recommend buying a copy of Unraid which is basically a significantly polished version of Linux NAS software devoid of the rough edges a community project like OMV has. I have a separate Unraid server and can attest to its quality. This all being said, OMV is an rock solid platform. Once up and running, the server chews through any task I throw at it. I currently have a docker instance running Plex which is able to transcode one or two 4K streams without a hiccup. I would bet the DS220+ can barely handle one.